Top 3 Features You Should Try With Photoshop
TechsPlace | Photoshop is really a powerful image editing software/tool. If you’re some sort of professional in editing pics with Photoshop, you can do anything in image editing right! But, as a beginner, we don’t know most of the Photoshop’s features. There are a lot of tools available in Photoshop which can do some magical things for you.
If you’re not very familiar with the Photoshop but interested in learning some PRO trick then you should definitely read out this complete article. We’ve shown top 3 features you should try with Photoshop. Every feature is discussed in details with the step-by-step guide.
Photoshop can do some dramatic things with the pictures e.g removing objects from the image, merging two pictures and much more like that. We’ll be giving you some examples you should try as the beginner.
Feature 1: Removing Objects From Image Using Photoshop
This might be one of the awaited things you want to learn in Photoshop. But, you might be thinking that it’s the toughest task in Photoshop, Right! But, it’s never been easier in any photo editing tool rather than Photoshop.
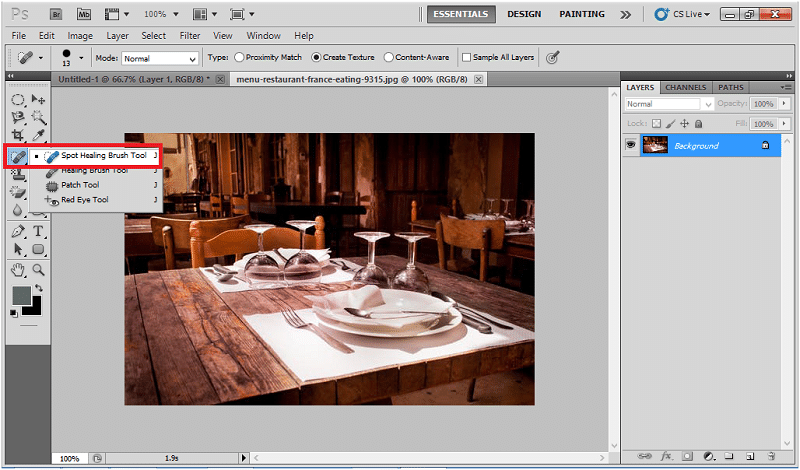
There’s is a tool named “Spot Healing Brush Tool”. This tool is very easy to use and one can easily remove things from a picture.
It’s obvious that it takes some time to do the PRO things with tools in Photoshop. You still need to use your mind and skills to remove things from your pics using “Spot Healing Brush Tool”. Below are the detailed steps to do this.
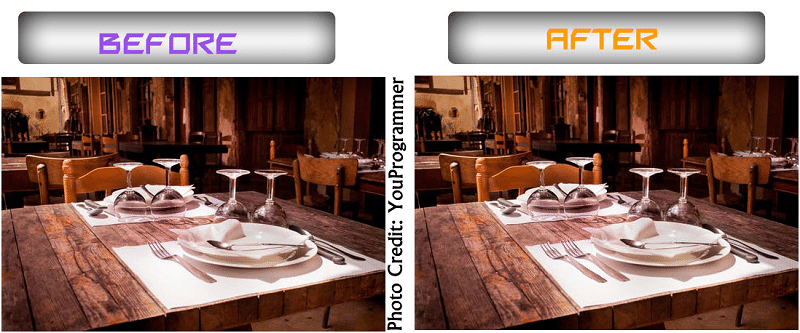
Here’s the little RECAP what actually we’re going to do:

Not Bad Right! It takes only 2 minutes to remove that spoon from that pic. Here’s how:
- First, drag the image into the Photoshop, e.g open the pic you want to edit.
- The from the Toolbox Window, select “Spot Healing Brush Tool” you can press “J” key which is its shortcut by default.

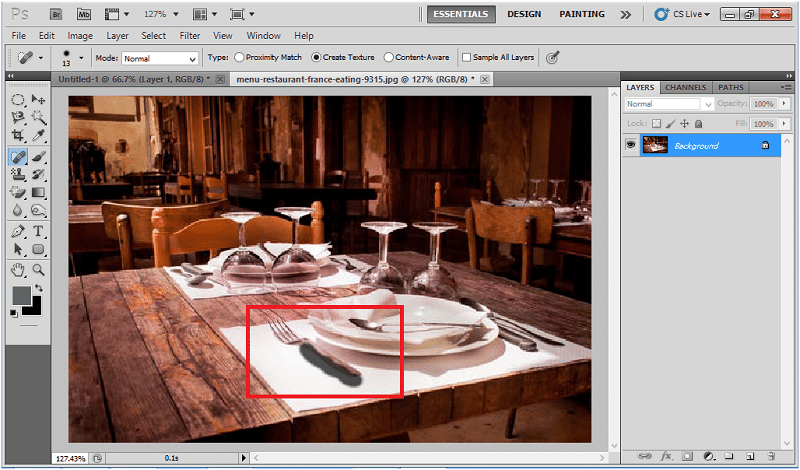
- Then simple and gently drag over the object you want to remove. Make sure you adjust the hardness e.g Right-Click>Adjust The Hardness.
- Release the click and part of the area over which you’ve dragged will be removed.
- Try the same process with several pics to gain expertise in the process.
Also Read: Make Background Transparent using paint
Feature 2: Adding New Objects Into The Picture
Sounds crazy right!. Anyone can seamlessly add new objects into the picture using Photoshop. This way you can add funny pictures and can fake your visit to the famous beach as well. This sounds interesting, isn’t it!
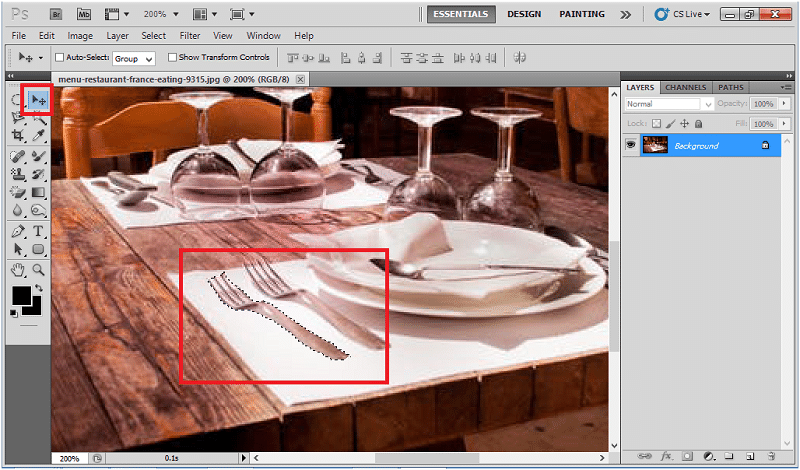
We need to use some tool in the Photoshop in order to do this. We’ve done the procedure with the same picture we’ve used before. Below is the RECAP of that picture:
As you can clearly see that there are two spoons in the second picture. We’ve colned that spoon from the same picture. Below are the steps you need to perform to do the same:
- Open both the pictures in the Photoshop. If you want to clone objects within the same object then there’s no need to open the same picture twice.
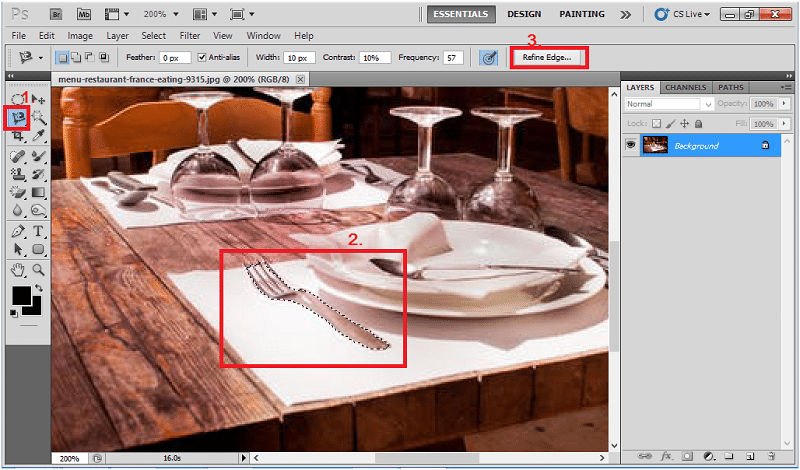
- Now, we need to use the lasso tool to select the portion of the image to clone/add into another object. “Magnetic Lasso Tool” is a perfect choice.
- Then gently drag over the part you want to clone.
- Once you’ve completely drawn over the partition you want to clone, you’ve two choices, if that selected partition needs to be added into another picture: Select Refine Edge and follow next steps as well. But, to clone that object within the same picture, Press “V” and then hold “Alt” and drag that selected area to clone. That’s it.
- To add that selected part to another picture, select Refine Edge option (Top Of The Screen).
- Choose New Layer option from the drop-down options menu.
- Click OK and your selected part will turn into the new transparent layer.
- Now, in the final step, press V to select Move tool, and drag that part to another picture. Or Ctrl+C and Ctrl+V should work as well. That’s it.
Feature 3: Apply Some Effects To Text
Photoshop is widely used to make some professional movie posters and many types of card. It’s because of there are a lot of features available to give different coloring, shadow effects, and much more to texts.
We’ll be discussing some starter text editing tips e.g features available in Photoshop which you should try as a beginner.
To Get Started:
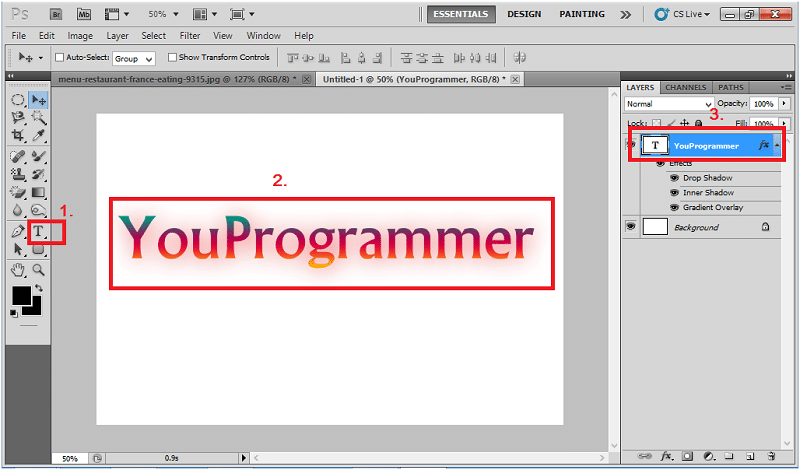
- Select Text tool from the tool window or press T on your keyboard.
- Click on the picture and type the text you want.
- Now, from the right side of the screen, e.g layer Window, double click on the text layer and Layer Style Window will appear.
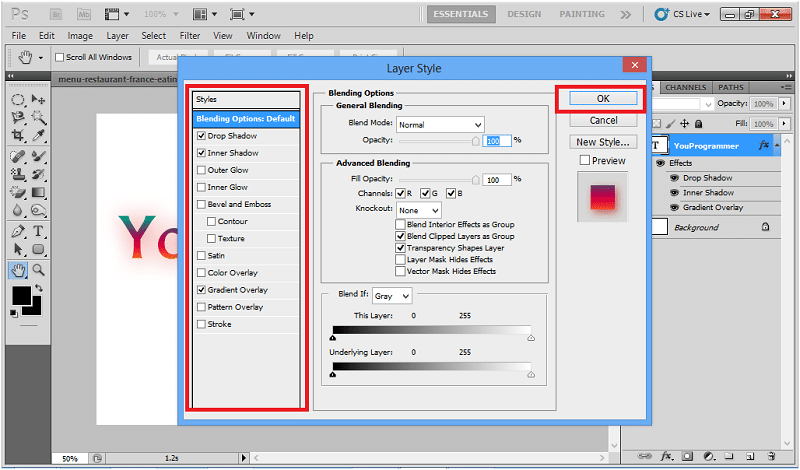
- From there you can select things like:
Inner Shadow: Helpful to apply the inner shadow to the texts.
Drop Shadow: Helpful to apply outer shadow to the texts.
Gradient Overlay: Some amazing gradients can be applied to the texts.
Color Overlay: Apply new color to the texts as per need.
And much more, just keep trying all those features, you’ll surely discover some amazing and useful features.
We hope you loved these best features you should try as a beginner in Photoshop. Drop down your comments/suggestions about these features.

This article is contributed by guest author on techsplace.com.


